Pumpkin decorating is a quintessential fall activity, but for busy moms who enjoy making their own seasonal decor, finding the time to carve intricate designs can be challenging. The good news is that you don’t need hours of free time or advanced artistic skills to create beautiful, festive pumpkins. With a few simple materials and some creative inspiration, you can transform your pumpkins into eye-catching decorations that your whole family will love. Here are five creative pumpkin decorating ideas that are perfect for busy moms.
No-Carve Painted Pumpkins
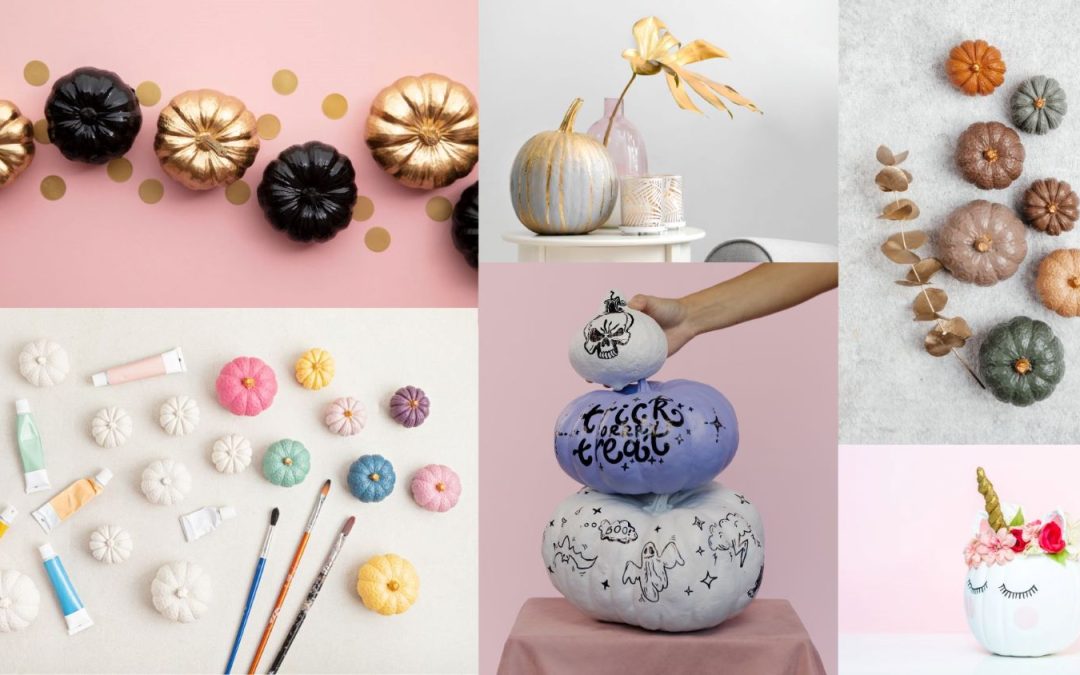
No-carve pumpkins are a game-changer for moms who want to avoid the mess and time commitment of traditional pumpkin carving. All you need is some paint, brushes, and a few other materials to create a stunning design.
How to do it:
- Start by selecting a base color that complements your home’s fall decor. Chalk paint works well for a matte finish, while acrylic paint offers a vibrant, glossy look.
- Once the base coat is dry, use stencils or painter’s tape to create patterns such as stripes, polka dots, or geometric shapes. If you’re feeling extra creative, freehand a design like a spooky face or a harvest-themed image.
- Add embellishments like glitter, rhinestones, or sequins for a little extra sparkle.
This method is not only quick and easy but also allows for endless customization. Plus, it’s a fun project that kids can join in on without the worry of sharp tools.
Decoupage Pumpkins
Decoupage is a fantastic technique for decorating pumpkins with intricate patterns or images without the need for artistic talent. This method uses paper cutouts and Mod Podge to create a beautiful, layered look.
How to do it:
- Choose a selection of thin paper, such as tissue paper, napkins, or scrapbook paper with patterns or images you love. You can also print out pictures or text that resonate with your fall theme.
- Cut the paper into manageable pieces, such as leaves, flowers, or abstract shapes.
- Brush a thin layer of Mod Podge onto the pumpkin and gently press the paper onto the surface, smoothing out any wrinkles or bubbles.
- Once the entire pumpkin is covered, apply another layer of Mod Podge over the top to seal the design. Check out this helpful video.
Decoupage pumpkins have a sophisticated, artistic look that belies how simple they are to create. They’re perfect for moms who want to add a touch of elegance to their fall decor with minimal effort.
Sticker and Vinyl Pumpkins
For the ultimate time-saver, stickers and vinyl decals offer a fast and easy way to decorate pumpkins. This method is perfect for moms with little ones who want to help but aren’t ready to handle paint or carving tools.
How to do it:
- Start with a clean, dry pumpkin. White or pastel-colored pumpkins work particularly well with this technique.
- Choose a variety of stickers or vinyl decals that match your theme. You can find everything from Halloween-themed stickers to autumn leaves and florals.
- Simply peel and stick the decals onto the pumpkin in your desired pattern.
This method requires almost no cleanup and allows for plenty of creative freedom. You can mix and match different sticker styles or even let your kids create their own designs. Best of all, when the season is over, you can peel off the stickers and start fresh next year.

Glitter and Glam Pumpkins
For the brave glitz and glammers looking to add some sparkle to your fall decor, glitter pumpkins are a dazzling choice. They’re easy to make and can be as subtle or as bold as you like.
How to do it:
- Coat your pumpkin with a thin layer of glue or Mod Podge, using a brush to ensure even coverage.
- Sprinkle glitter generously over the glue, turning the pumpkin as you go to cover all sides. Use a tray or sheet of paper to catch the excess glitter for reuse.
- Once the glue is dry, shake off any loose glitter and admire your sparkling creation.
To take your glitter pumpkin to the next level, consider adding ribbon, faux flowers, or a decorative stem. These pumpkins make a great centerpiece or accent piece and are sure to catch the eye.
Nature-Inspired Pumpkins
For a more rustic, natural look, consider decorating your pumpkins with elements from nature. This approach is not only quick but also brings a touch of the outdoors into your home.

How to do it:
- Gather materials like pinecones, acorns, leaves, and small branches from your yard or a nature walk.
- Use hot glue or craft glue to attach these elements to your pumpkin in a pleasing arrangement. You can create a wreath around the stem, make a leafy garland, or even spell out words with twigs.
- For a finishing touch, add a few sprigs of dried flowers or herbs to enhance the natural theme.
Nature-inspired pumpkins are perfect for moms who appreciate a more understated, organic look. They’re also a great way to involve kids in gathering and selecting the materials for their decorations.
On to the fun!
Pumpkin decorating for your home doesn’t have to be a time-consuming or messy task. With these five creative ideas, busy moms can easily create beautiful pumpkins that add a festive touch to their home. Whether you opt for no-carve painted pumpkins, decoupage designs, quick stickers, glittery glam, or nature-inspired decorations, you’ll have stunning results with minimal effort. So grab a pumpkin and some simple supplies, and enjoy a fun, stress-free decorating session this fall.
Shop Table Top Pumpkins and Table Top Minis Please note: Our pumpkins have very short stems.